I must admit, use of our Geometric Solids in the classroom has been sporadic and a bit uninspiring. For quite some time, I have been meaning to add some extension work to the material such as a set of matching cards. Enter the wonderful products at
Montessori Print Shop! I was recently provided the opportunity to review some of their products in exchange for a blog post which was an opportunity I did not want to miss. I have always been pleased with the quality of their materials, so I decided to try their Geometric Solids Sorting cards. This is a set of cards depicting each of the Geometric Solids with three corresponding photos for each shape. You can view more details of the product
here. As always, the process of making the set is just as much fun as watching it in use by the children!
Anytime I make materials for the classroom, I make sure keep consistency. For example, these beautifully illustrated cards come with convenient cutting lines where I am sure to cut on the inside - that way, there is no risk for the black line to appear on the cards themselves. Also, I took time to measure and cut black card stock to mount the cards onto. I think this gives the material a finished look and adds a certain depth to the photos. For control of error, I used color-coded dot stickers on the back of the cards. For example, the cards with a picture of a sphere had a red dot as did its three corresponding photos.
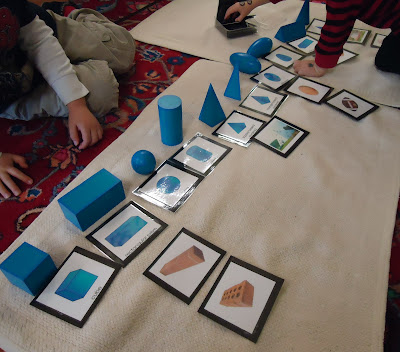
During the lesson, I first re-introduced the names of the solids. Then, I introduced the the matching Geometric Solid cards and the child matched the cards to the shape as seen in this photo:
Once the child was successful with the first set of pictures, I then invited them to sort the remaining photos underneath:
 |
| Sorting in progress |
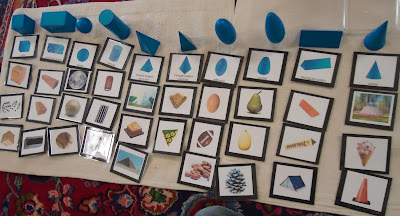 |
| Sorting completed. |
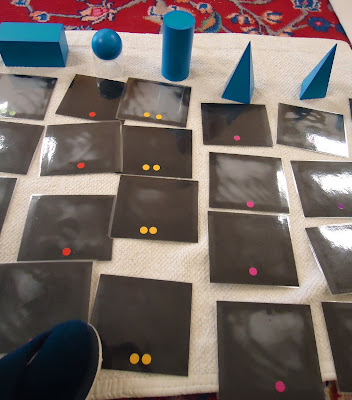 |
| Control of Error - matching dots on the backs of cards underneath each Geometric Solid. |
I was surprised with the visual impact the cards created once they were all laid out with the Geometric Solids. In fact, throughout the lesson, several children in the classroom came to see what the "new work" was and I heard more remark, "Oooh, what's that? I want to do that!" It was heartening to see a new interest develop in the
Geometric Solids sparked by
this quality set of cards from
Montessori Print Shop.


